Showing posts with label gardening. Show all posts

Sunday, May 5, 2013

First Spring Harvest


Our first harvest of the springtime has arrived!! We were hoping to get some lettuces and greens earlier in the  colder months of spring, but it just did not work out that way. We will try again next winter :)

But right now, we are enjoying some beautiful red and white radishes harvested from the garden, along with some spring onions, lettuce, and baby spinach!

red and white radishes, spring onions


we have been harvesting the lettuce as we need it


Our sweet friends that live not far from us brought us fresh asparagus harvested from their garden--isn't is beautiful?


Pretty soon we will have kale available for cooking with collards following not too long afterwards! Our garlic is doing really well and should be ready perhaps in the next month. Fresh herbs have re-grown on their own, and we have TONS of lavender.

garlic


chives (they grow back every year on their own)

one of the lavender plants

So incredibly excited, I feel like our garden is finally at the productivity level we've always hoped for. After a couple years of only so-so harvests and a lot of total flops, we have learned how to make our garden healthier and give it what it needs most.

onions

This includes lots of extra compost, little natural fertilizer and extra sunlight. The sunlight may have to be achieved by cutting down one of our trees. Although I really hate to do this, our yard is heavily wooded and there aren't many other places we could put it to receive that needed sunlight.

Another thing we have invested a lot of time in is starting our seeds indoors, moving them to bigger pots and hardening them off before transplanting outside. We use a simple home-made grow light that I showcased in this post as well as our cold frame for giving new seedlings the warmth and light they need.

My hope is to be harvesting something every week or two from our garden! How does your garden grow this spring?

Happy Harvesting,


Sharing with:


Tuesday, April 30, 2013

DIY Wood Pallet Potting Bench


Did you know you can make an adorable, functional potting bench from leftover (and usually free) wood pallets? Yes, you can!


My husband found this idea and ran with it-- his work has several leftover and free wood pallets each week, so he grabbed about 3-4 and brought them home. The only portions he had to purchase new were a couple of wood 2 x 4's, which we aged with a solution of vinegar, steel wool, and coffee grounds to match the rest of the wood.

The potting bench in progress:


The finished potting bench:


We will use this piece for much more than potting and caring for plants and seedlings. Since its home is on our screened-in-porch, it will be used to store coolers on the bottom shelf, act as a bar/buffet for parties and gatherings, and  will be a great place to attempt messy projects that we'd rather not try indoors. Most of all, it will be a great one-stop center for all of my gardening and planting gear that I don't want to keep in the shed!


If you are handy with a saw and building stuff like my hubby, click here for some instructions.


Sharing with: 


Saturday, March 2, 2013

First Spring Blooms


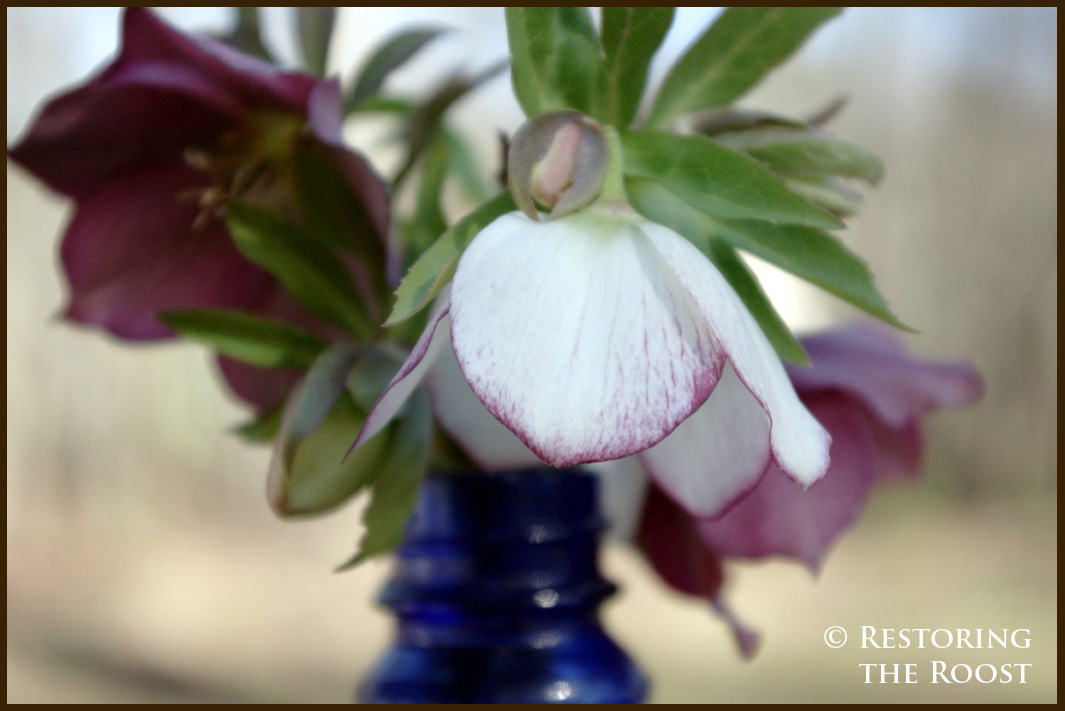
Here at the roost, our first blooms of the early spring were unexpected: Hellebores!


Even before the daffodils, the Hellebores popped up with their beautiful downward turned purple and white blooms. Sometimes these plants are called Lenten roses and they grow well in shade. A hallmark plant of a southern garden, the hellebore is one of my favorites. When I used to work at a historic site in Hillsborough (www.burwellschool.org), the site's impressive garden had an heirloom variety that was a beautiful apple green color. Our Hellebores are a pretty purple variety and a white variety with purple accents.

the Hellebore plants in our yard- they come up in clusters and have multiplied every year

In order to see the wonderful blossoms, you almost have to use your hand to turn the petals upward.


The blooms fit perfectly in one of my vintage cobalt blue medicine bottles from my collection that one of our relatives found along the Haw River.


Such lovely flowers that foreshadow the spring that is to come!


Happy early Spring,


Saturday, February 16, 2013

Starting Seeds Indoors & a DIY Grow Light Tutorial


It's time to start seeds indoors already! (At least here in NC it is). We started seeds for several varieties of vegetables a couple of weeks ago and they are coming up nicely. We have seeds planted for tomatoes, peppers, cauliflower, cilantro, broccoli and kale. For those of you wanting to start your garden seeds indoors, do you know you can make your own grow light for a mere $20?


That's right--a cheap grow light made from PVC pipe, a fluorescent light, and metal hooks that can be taken apart or disassembled when not in use!


Here is what you will need:

- PVC pipe (three 1/2"x10')
- hand or chop saw
- 1/2" PVC corners (6)
- 1/2" PVC tees (2)
- 48" dual tube fluorescent light with included chains (runs about $12)
- appropriate fluorescent tubes (2)
- J hooks and nuts (2) for securing lamp into PVC piping
- drill and drill bits

For starting seeds:

- seed starting trays or pots
- soil
- pencil
- seeds
- towel
- water in spray bottle

Here is what you will need to do:

The stand can be assembled in two sections, the base and the hanger. The base is just a rectangle made with two 50" and four 12" lengths of 1/2" PVC pipe, assembled with four 1/2" corner connectors and two 1/2" tees. The long side of the rectangle must be slightly longer than the light fixture, so if you choose a different size light, scale this dimension appropriately.


The pipes should fit snugly into the connectors, so no glue is needed to hold the whole thing together.


The finished stand is shown below. The open hole of the tees should point up in order to receive the riser pipes.


The hanger is shown below. The risers (top and bottom of the picture) can be cut to whatever length needed to hang the light at the desired height. I chose 3 feet, but later cut some shorter risers so that the light can hang closer to the seedlings. One to two feet should be plenty for shallow seed trays. The cross bar (the part that supports the light fixture) should be the same length as the longer side of your base (50" in this case). Two corner connectors hold the whole hanger together.


You can hang the light on the cross bar however you prefer, but J hooks were cheap and keep the fixture securely in place. Simply measure the distance between where the chains connect to your light fixture and drill two vertical holes (slightly larger than the diameter of the bolt portion of the J hook) centered that distance apart in the cross bar. Throw a nut on each J hook and you're ready to assemble everything.


Push the ends of the riser into the open holes of the tees in the base, and then hang the light fixture by the included chains. That's it! Should take 30 minutes or less. The nice thing about this setup is that it can be easily customized to your particular needs. With two more tees added to the base, another hanger can be added to accommodate a second fixture. Since you didn't have to glue it together, the whole thing can be disassembled and stored under a bed or in a closet at the end of the growing season.


To start the seeds, use high quality potting soil or organic compost with soil and place in seed starting trays (we used the Jiffy trays with the plastic tops and recycle them each year).

I use a pencil eraser to push a little indention into each seed container, then drop a seed or two in each one. Make sure and keep a list or diagram handy to write down what seeds you have placed where. Cover seed holes back with soil and water well.


Place under grow light and monitor growth (we also kept a towel underneath our seed trays). Water every day so that soil doesn't dry out (or use a self-watering seed starting tray). We keep the grow light on the seedlings about 16 hours per day with the help of a three-prong light timer.

You may have to give it several days to germinate before you see growth, so be patient! Before too long we will have to transplant these to bigger pots, and then out to our cold frame, and then finally into the ground when it is warm enough.


Are any of your starting your seeds indoors this year?


Linking to:


Tuesday, January 15, 2013

Winter Garden


Gardening in winter? Why, yes!

red or yellow onions

Normally we let our garden go fallow for the winter.....at least most of the beds. But since last year we had such an unseasonably warm winter and could have practically grown veggies all year long, we decided to try our hands at growing some cold-tolerant crops, along with our annual planting of garlic and onions.

garlic growing strong (this is the bed where half of it was destroyed by the chickens)

Just on a side note- we planted a couple beds full of garlic and onions, and one of them got completely torn up by the chickens :( They learned how to fly up on our back patio railing, and then down into the garden bed encapsulated with chicken wire to forage for bugs. SO FRUSTRATING!
Oh, and one of the beds that we had planned for broccoli and winter squash has now been claimed by the chickens as a dust bathing container....*sigh*......so much for that garden bed. One of these days I am going to learn which plants I can plant around the beds to discourage the buffet of plant sampling.

bed made of cut local bamboo (chickens have been dust bathing in it :( 

Anyway, enough of the chicken ramblings. This winter along with the garlic and onions we planted peas, more radishes, collards, kale, lettuce and other cold-hardy greens and root vegetables. We shall see if any of these actually do well (in the past they have not done so great). Our peas are not looking so good.

onions and turnips (I think?) in the background

the sprouts of kale or collards (can't remember which)

What usually happens with our root veggies is that the green tops grow nice and large, teasing us with what might be underneath, and then when they are pulled up the root is practically nothing! We add compost to the soil and everything. Anyone have tips for growing root vegetables in raised beds?

radishes

It is almost time to sow our seeds indoors! I'm getting excited--planting in early spring or late winter is always so refreshing and a hopeful start to the year :)


Thursday, November 29, 2012

Dried Foods from the Garden


In preparation for winter's onset, I planned to dry some of our beans and legumes from the garden for eating later on. It is interesting how I am learning nature's seasonal cycles in terms of food preservation and the how our diet naturally changes with the seasons.

Remember my post on shuck beans? Well, I began drying small batches strung up with thread in my entryway, and prior to Thanksgiving they were all dried out and ready for cooking:

shuck beans dried and still strung together

My shuck beans aren't that great looking-- I think partly because I either picked them too early on and did not let the pods fully mature, or I didn't have the right kind of bean. Either way, we tried a batch for Thanksgiving and I'm going to try another batch for a special dinner sometime in January or February. They actually turned out pretty good after simmering all day!

rather sad-looking shuck beans

I also dried all my southern peas this year. I plan to soak them before using and toss them in with some other dried bean varieties, onion, and some sort of fat or bacon to stew for hours on the stove on a cold winter day.

dried southern peas- I stored them in a breathable burlap bag after harvesting so that they could fully dry out


dried southern peas

I am in love with roasted pumpkin seeds, and we happen to have tons of them from all our decorative pumpkins that graced our steps in October. To roast and dry, simply toss with olive oil and seasoned salt and pop in a 350 degree oven for about half an hour.

Another thing we tried a few weeks back were home-made apple chips from fresh local apples grown here in North Carolina. Although not from our garden, at least they were grown in our state! They were easy to make and extremely addicting. To make them, slice the apples thin with a mandoline if you have one, sprinkle with cinnamon sugar and bake on a low temperature for about a half an hour or so on each side until apple slices are dried into chips.

homemade apple chips


Have you saved and dried any foods from your garden to enjoy this winter?


Linking to:

Saturday, November 3, 2012

October-November Garden


You may not necessarily think of October or November as months for gardening, but there are several vegetables that can still be grown at this time of the year (especially in the South!).

One of the easiest ways to still get produce from your garden is to plan for succession planting.

Succession planting is where you can replant vegetables from earlier in the spring or summer to grow in the fall or even the winter, getting another growing season out of them each year. It maximizes the yields of your garden because you can plant small amounts of a single crop at different times throughout the year, ensuring a consistent supply spread throughout the year. It is probably wise to rotate the location of each crop. To learn more about succession planting, check out this article here.

sweet onion sets ready for planting

The fall months are also a good time for planting a variety of cold-weather or cold-tolerant plants, like collards, kale, swiss chard, some lettuces, broccoli, onions, garlic, peas, beets, and even radishes.

this bed is prepped for winter and planted with garlic, sweet onion, and red onion


onions are already sprouting from the soil

So far this fall we have planted more lettuce, garlic, onions, broccoli, snap peas, radishes, carrots, and a few other things. We also plan to plant kale, collards, and some other greens, which we may have to transplant to the cold frame if the temperatures drop to freezing. Unfortunately, the bed in which we planted the broccoli we neglected to protect with chicken wire, and ALL of the plants got eaten by the chickens!!! I was so mad at them.

a small bed planted with lettuce is finally getting closer to harvesting


My bean plants are still going strong and we are still getting a few peppers and southern peas!

pole beans


a couple day's worth of pole beans harvested, lots more pods still on the plants


For some reason root vegetables don't seem to grow well in our raised beds, so I'm not expecting them to produce much. It makes me sad, because I LOVE beets, carrots, turnips, parsnips, radishes and potatoes. We will try these again perhaps somewhere else in the garden and see if they do better. Do you have problems growing root vegetables? I can't figure out what our deal is-- but they do not like us!

A new activity we are trying with the garden this year is planting a cover crop of hairy vetch. I have no clue what this is but apparently it will help the soil throughout the winter in preparing for spring planting.

What does your fall garden look like? Do you plant a cover crop or allow you garden to go fallow?


Linking to: